Friday, May 20, 2016

Monday, January 18, 2016
Freebies Culled from Around the Net
Here are a couple freebies That I have culled from different sites. I will keep updating them regularly and if any those not work, let me know so I can take it down.
Free Philosophy Renewed Hope Cream Jar Sample: http://bit.ly/1RU0K4R
Free Bag of Lip product from Lip Monthly: http://bit.ly/1Ospvml
Free PG baby stuff: http://bit.ly/1K1hxC6
Free Yoga Gear: http://bit.ly/1JKJhuJ
Free Garnier Whole Blends: http://bit.ly/1RSFH4p
Free Body Shop Drop of Youth Deluxe size sample: http://on.fb.me/1KhXwXV
Free Skinade Sample: http://bit.ly/1njwaGB
Free Truvia Sample: http://bit.ly/1VxY7Wc
Free sample of Mijello watercolor paints: http://bit.ly/1R0V7A0
Free Philosophy Renewed Hope Cream Jar Sample: http://bit.ly/1RU0K4R
Free Essential Oil Samples: http://bit.ly/1Q9EHFu
Free PG baby stuff: http://bit.ly/1K1hxC6
Free Yoga Gear: http://bit.ly/1JKJhuJ
Free Garnier Whole Blends: http://bit.ly/1RSFH4p
Free Body Shop Drop of Youth Deluxe size sample: http://on.fb.me/1KhXwXV
Free Skinade Sample: http://bit.ly/1njwaGB
Free Truvia Sample: http://bit.ly/1VxY7Wc
Free sample of Mijello watercolor paints: http://bit.ly/1R0V7A0
For Canada Only
For Brides to Be: http://bit.ly/1UgAHEq
Free FROYO: http://on.fb.me/20ejGBY
Free Nasal Rinse Pot: http://on.fb.me/1QOjZ0g
Free FROYO: http://on.fb.me/20ejGBY
Free Nasal Rinse Pot: http://on.fb.me/1QOjZ0g
Tuesday, January 12, 2016
PinchMe Samples Live Now!

Pinch me samples just went live like 10 minutes ago. Follow this link to sign up and get yours now before they are all gone. Not sure what Pinch me is all about? Just go to Youtube type pinchme haul or un-boxing and see what other people are getting with Pinch Me. Also refer to my post on 'How to get started with freebies" I mentioned this in that post along with other site from which to get free stuff.
#samples
#free
#freebies
#pinchme
#freestuff
Monday, January 11, 2016
Free Credit Card Reader

Running your own business, home-based business, a DSA business or just sell things or your own craft can be hard and difficult most of the time. Even if you are a great sales person most times you come across things you cannot help. An example of this is when you have successfully sold someone something, but they do not have the physical cash available to make the purchase and you know you cannot reach this potential customer again. One great thing is that most of these people do carry their credit cards or debit cards with them! Now how do you convince them to go with you to an ATM to withdraw the funds? Now what if you could receive the payment right there with their credit card without going to an ATM? Well you can with the Square Credit Card Reader, it is small, simple, chic and convenient to use anywhere, anytime. All you need to do is plug it into your smartphone or tablet, download the app and you are good to go. Now you can receive both credit and debit (for US only) card payment on-the-go and on-the-spot. Now for a limited time you can get the stripe only credit card reader absolutely free with free shipping, plus get $1000 or 6 months free processing of payments with no monthly or annual charge (which ever comes first). The stripe reader is not the only one available, but the only one free, they also have a small stripe and chip reader for about $25, a contact-less NFC tech and chip reader that accepts apple pay for just $50, and a POS stand for tablets like iPad, Samsung Galaxy and LG G pad for $100. If you are looking to setup a store the stand is compatible with many cash drawer and scanner. Now not only can you pitch a sale but also close it, you can even hold pop-up sales event, on location display and sales event and host house parties where physical cash is not a major requirement. To get this click here
Wednesday, January 6, 2016
How to get started with freebies

Welcome to my first post of this year. Some of the things I will be sharing in this post are what I wish someone had told me when I first started my sampling, freebies and free money journey. If you start this with out some guide as to what is what, you may end up in scams and lose money instead of getting it. I will discuss these things in phases over many post, and keep updating new ones and changes to programs. So keep checking here for many ways to save and get free things.
Sampling Sites
There are many sites that give people free products to sample or try. I will be listing them and also explaining how they work.
Sample Source
Sample Source members get the chance to "try before you buy" - with free samples from top home, health, makeup, and food products. Why? So you can make smart shopping decisions! Only registered members get access to samples.
Step 1
Register a free account (you can log-in with this every time)
Step 2
Answer some profile questions so they get to know you (it helps to find samples you may be interested in)
Step 3
As soon as more samples are available they will email you, so you can log-in to pick what you would like to try!
then they ship them to you absolutely free so you can "try before you buy" and make smart shopping decisions! That's it. That's all. Pretty easy don't you think?
Social Nature
Social Nature is dedicated to helping people make greener choices. As a member of Social Nature community, you'll get to try greener choices like organic deodorants, vegan mascara, healthy snacks and eco-friendly cleaners for FREE. In return, you share your opinion with the community, and if you liked the product, invite your friends, fans and followers to try it! To join click here
Pinchme
Pinchme is a sampling site that send out full size samples of product to their member from time to time. They give everything from personal care, pet products, household cleaning products, food, and sometimes tech stuff. To sign up now click here. They have samples going out on 12th Jan 2016 by 12pm EST. It is a first come first serve!
Pink Panel
Pink Panel is another sampling site. They do not send out samples in a cycle, but just as soon as they have a product for sampling and testing. They give more of health and beauty products, to sign up click here. For a higher chance of being chosen, you have to be referred by and existing member, so when signing up select that you are being referred by an existing Pink Panel member and enter Nkiru Odunukwe .
Everyday Sample
This is a company site that is giving out baby samples free. Their available sample now contains baby wipes, baby bath and laundry product and some supplements. They are all sample sized, to get this click here.
Product Review Sites
Product review sites are sites that look for people who will try products and then spread the word about the about the product they received by writing reviews and posting on social media. Here are some of them
Bzz Agent
Bzz Agent is a word-of-mouth (WOM) AD campaign site. They hold campaigns regularly, where chosen members of the Bzz community get free full size products, from household cleaners, food, appliances and cosmetics to try for free and review and spread the word, the Bzz boxes also contains coupons for more of the product to be given to friends and family. If you want to start receiving your click here
Influenster
This is a product review site, where members review products they have used. Every now and then active members are chosen to receive full size product to try and review. It come in two categories, the first is a brand sample and the other is their famous Voxbox program. In their Voxbox, people chosen get 7-8 full size products to try and review. To sign up simply click here
Luuux
Luuux is a micro blogging site where you write relevant articles and you get paid also you can use the money you earn on that site to buy products on the site. You also get paid every time people read your blog article. To sign up and start earning now simply click here
Klout
Klout is a lot like influenster, that takes into consideration your social media sphere of influence and your rate of activity on them. So the higher your Klout score the more Klout Perks you get and they are boxes of full sized products from many companies. to sign up click here.
Swaggable
Swaggable gives you a fun and easy way to discover and try interesting new products for free, and share your finds with others. Sound good? If you like trying and discovering new products, and companies launching new products are looking for the right people to try them. It sounds like a perfect match, but it’s been hard for these companies to find the right consumers to try their products, get feedback or drive reviews. That’s where Swaggable comes in. They connect you with free samples of new products that you’re interested in trying and give you an easy way to share these new experiences, through reviews and coupons. To signup click here.
Chick Advisor
This is another product review site, that has a sampling program. To be eligible to apply to review free products when you sign up, you must review 3 products you have used in the past. To register for this panel click here. They have a current product for review, the Maybelline Deam Velvet Foundation here.
Rebates / Cash-back Sites
Rebate site and cash-back sites are sites that offer you money back for buy the things you regularly buy. Some products when bought in store offer rebates of either full or partial value, but rarely do you see them for online purchases. These sites offer that you consumers now, here are a few I know.
Ebates
We all love rebates, but sometimes what we want to buy is online or has no rebate offer, Well that is why we have Ebates. Ebates is the pioneer and leader of online cash back shopping. Ebates pays members cash back every time they shop online as well as provide them with the best coupons and deals online. To join and start earning and also get a free $5 to start you off click here.
Product Testing Sites
Product testing sites are almost the same as sampling and review sites, but the only difference is that as opposed to the others wanting you to tell as many people as you can, posting it everywhere that you received the product, testing sites require secrecy and non-disclosure of the product you are testing. Sometimes you get to keep the products you test, other times you return it and get rewarded another way. Here are some that I know of.
Betabound
This is mainly a tech product testing site. They offer from hardware to software, you get request to test smartphone, eletronics, apps and websites. Beta testers try out and give feedback on hundreds of products each year from some of the biggest names in tech. To get started, you'll need to create an account and complete your member profile. Once that's done you can apply for available beta tests. You'll also start receiving emails about upcoming beta tests that are relevant to you, so you can apply quickly for the ones that interest you. To sign up click here.
Wednesday, December 5, 2012
Make-up: Lips
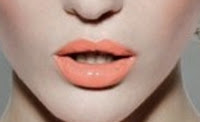
Make up in today's fashion is now beyond the rouging of lips and cheeks, kholing the eyes and staining of our nails, we have come very far past the rice powder days to times where our faces are now an artwork. Dual colour lipstick application and bright colours are now a trend. Bold and daring colours and application are now a fashion statement, helping women distinguish their outfits and style. Red is not the colour of the adventuress any more, it is now the bolder the better. To truly create a masterpiece and distinguish oneself from the mass, look and texture of the finished work is key. Is it going to be a glossy, matte or glittery look? Here are some truly amazing lip art.




Monday, August 20, 2012


Sunday, August 5, 2012
Color and Chic


Summer gives us that leeway to show our style and fashion. Here is one of our fashionistas expressing her summer style with this bright and gorgeous ensemble. Would you have dressed this any different, if so how?
Tuesday, August 2, 2011
DIY Projects:A Funky Braid Hairstyle.


1. Create a middle part and divide hair into sections.
2. Prep each section with curl spray, then curl using a 1-inch-barrel curling iron and pin to the head.
3. Once all sections are completed, take out the pins and brush the curls with a paddle brush.
4. Flip your head upside down and spray dry shampoo throughout hair for added texture, lightly combing the product through with your fingers.
5. Flipping your head upright, divide hair into two sections down the middle of the head, and begin to create two French braids, starting at the top of the head to the base of the neck.
6. From the base of the neck, create two fishtails braids, and secure them with clear elastics, leaving some length on the ends loose.
7. Lightly rough up hair at the top of the head, pulling a few pieces loose with your fingers, and finish by lightly applying frizz cream in a backward motion.
2. Prep each section with curl spray, then curl using a 1-inch-barrel curling iron and pin to the head.
3. Once all sections are completed, take out the pins and brush the curls with a paddle brush.
4. Flip your head upside down and spray dry shampoo throughout hair for added texture, lightly combing the product through with your fingers.
5. Flipping your head upright, divide hair into two sections down the middle of the head, and begin to create two French braids, starting at the top of the head to the base of the neck.
6. From the base of the neck, create two fishtails braids, and secure them with clear elastics, leaving some length on the ends loose.
7. Lightly rough up hair at the top of the head, pulling a few pieces loose with your fingers, and finish by lightly applying frizz cream in a backward motion.
Are you now thinking, How am I going to pull this off? Admittedly, it’s definitely quite the undertaking. I’m not sure my fingers (or my patience!) are up to the task, but if you pull it off, we simply must see a photo, so send one along!
DIY Projects:Re-cycle, re-purpose and re-fashion.
A sure way to make your closet ever fresh, long lasting and money saving is by the code of the three R`s. Re-cycle, re-purpose, re-fashion. Looking fabulous for lees is not all about sales and 90% off, some times it requires just lil' ol' you to do the trick. Here are some tips for this fall.
Old t-shirts:

2. Turn right side out. Fold cut edges under ¼” and press. Fold under 3/8” and press down. Hand stitch or use fabric glue to secure.
3. Sew hook-and-eye closure at even points on each side of neck.
4. Lay shirt on flat surface, front facing up. Arrange flowers and pin. Sew individual flowers. To make bottom layer of petals lie flat, add a drop of glue underneath.

2. Remove clasp of necklace using needle-nose pliers. Knot loose strands to keep beads in place. Add a dab of glue to reinforce knot.
3. Use small scissors or seam ripper to make a tiny slit (start with 1/8”; increase if necessary) at each shoulder seam, as marked.
4. Turn shirt right side out and carefully tuck ends of necklace into torn shoulder seam. Sew ends in place securely, and sew holes closed. Reinforce with a dab of glue.
5. Tack necklace in place by sewing it to neckline, then along outside edge. Add stitches as needed to keep necklace in proper position.

2. To make sashes, cut each sleeve open along seam. Fold each in half lengthwise and cut at crease to create two equal pieces. You should have four total.
3. Glue two pieces of sleeve fabric together at hemmed ends, overlapping one on top of other about 1”. Join remaining two pieces in same way.
4. Lay one sash on ironing board, wrong side up. Turn one long edge of strip under (toward wrong side) ¼” and glue in place. Repeat for other long edge, and one short edge. Fold sash in half lengthwise, right side out, and press. Make sure that folded sash is the same width all the way down. Glue hemmed edges together, leaving one short edge raw. Repeat for other sash.
5. To attach sash to shirt, line up closed end of one sash with shoulder seam and glue in place so sash falls to front of shirt. Repeat with other sash.
6. Cut raw ends of sashes at a 45-degree angle. Turn edges under ¼” and glue.
7. Reinforce as needed with a simple hand stitch.

2. Cut each sleeve open along the seam. Fold in half lengthwise and cut along the crease. You should have four pieces total.
3. Arrange pieces end-to-end, wrong side up, on a flat surface. Make sure they are all going in the same direction, so that each hemmed end is next to a raw end. Overlap the pieces ½”, so raw edges are on top of hemmed edges. Glue pieces together to form a long strip. Working on length of strip, fold one edge under (toward wrong side) about ¼” and glue in place. Leave other edge raw. Fold short ends under about ¼” and glue in place.
4. Turn shirt right side out. Align one end of strip with a shoulder seam, right sides together, and pin so that raw edge of strip and edge of collar are aligned. Continue to pin edge of strip to edge of collar all the way around. Trim end of strip so it overlaps about ¾”. Working in small sections, glue cowl strip to shirt, about ½” in from collar’s edge. Glue ends together so they overlap.
5. Turn shirt wrong side out. Fold cowl strip over and pinedge to inside of collar. Working in small sections, glue pinned pieces together, about ½” in from collar’s edge.
6. Iron collar to make a crisp fold.

2. Arrange shirt on flat surface, front facing up. Measure distance between bottom of arm holes, then mark center point with a pin. Pin one end of a ribbon ½” to right of center, and a second ribbon ½” to left of center. Pin remaining pieces so there is about 1” between. Try shirt on and adjust spacing. Decide how long you want ribbons and trim accordingly (mid-abdomen tends to be most flattering).
3. Attach ribbons, using a thin bead of glue on back of each. Press down to set, making sure lines are straight.

2. Lay tank on flat surface, front facing up.
3. Make a thin bead of fabric glue down center of ribbon’s reverse side. Starting at one shoulder seam, adhere ribbon to shirt, lining up ribbon and collar edges. Continue until ribbon ends meet. Trim so that there is an extra ¼” of overlapping ribbon. Fold raw edge of ribbon under ¼”. Secure with fabric glue, then glue to shirt so ends of ribbon join. You can sew ribbon in place using a loose running stitch.

2. Arrange shirt on flat surface again, opening it up so that reverse side of fabric faces up.
3. Working on a raw edge, apply a thin bead of glue down length, close to edge, and fold over. Repeat on other raw edge. To finish hem, wait for glue to dry, then make another thin bead of glue down length, close to edge, and fold over. If desired, reinforce by sewing hems with a simple hand stitch.
4. Arrange shirt on flat surface so cut edges meet in the middle. Use fabric pencil to mark where you want buttons to go. They should start right at the V, about ½” in from the edge. Sew in place. Note: Buttons should go down shirt’s left side (right side when shirt is facing you).
5. Pull other side of shirt to overlap button side by about 1”. Use fabric pencil to mark center point of each button, where holes will go. You might want to try on shirt to make sure everything is aligned.
6. Measure diameter of buttons― you will create holes that are ½ to ¾ that size. (The stretchier the fabric, the smaller the hole.) Start hole by pinching fabric over the marked button spot and cutting a small vertical snip. Release fabric and continue to snip until hole is correct length, about half as long as diameter of button. Repeat for each hole, testing hole as you work to ensure you have proper alignment and size.
7. Turn wrong side out and sew around each buttonhole, looping thread through hole so that edges are fully wrapped in thread to prevent fraying.
So with these tips you can get your fall fashion rocking and trendy. Fashion does not have to be a hassle although it could be a chore. So gather your girlfriends and have a Saturday of fun and fashion where you each bring new ideas coupled with these to create unforgettable unique pieces. What other ways do you know to re-purpose your closet? Share your ideas and pictures with us.
Old t-shirts:
Floral-applique shirts
YOU’LL NEED:
2. Turn right side out. Fold cut edges under ¼” and press. Fold under 3/8” and press down. Hand stitch or use fabric glue to secure.
3. Sew hook-and-eye closure at even points on each side of neck.
4. Lay shirt on flat surface, front facing up. Arrange flowers and pin. Sew individual flowers. To make bottom layer of petals lie flat, add a drop of glue underneath.
Necklace tank
YOU’LL NEED:
2. Remove clasp of necklace using needle-nose pliers. Knot loose strands to keep beads in place. Add a dab of glue to reinforce knot.
3. Use small scissors or seam ripper to make a tiny slit (start with 1/8”; increase if necessary) at each shoulder seam, as marked.
4. Turn shirt right side out and carefully tuck ends of necklace into torn shoulder seam. Sew ends in place securely, and sew holes closed. Reinforce with a dab of glue.
5. Tack necklace in place by sewing it to neckline, then along outside edge. Add stitches as needed to keep necklace in proper position.
Sash tank
YOU’LL NEED:
2. To make sashes, cut each sleeve open along seam. Fold each in half lengthwise and cut at crease to create two equal pieces. You should have four total.
3. Glue two pieces of sleeve fabric together at hemmed ends, overlapping one on top of other about 1”. Join remaining two pieces in same way.
4. Lay one sash on ironing board, wrong side up. Turn one long edge of strip under (toward wrong side) ¼” and glue in place. Repeat for other long edge, and one short edge. Fold sash in half lengthwise, right side out, and press. Make sure that folded sash is the same width all the way down. Glue hemmed edges together, leaving one short edge raw. Repeat for other sash.
5. To attach sash to shirt, line up closed end of one sash with shoulder seam and glue in place so sash falls to front of shirt. Repeat with other sash.
6. Cut raw ends of sashes at a 45-degree angle. Turn edges under ¼” and glue.
7. Reinforce as needed with a simple hand stitch.
Cowl-neck sleeveless
YOU’LL NEED:
2. Cut each sleeve open along the seam. Fold in half lengthwise and cut along the crease. You should have four pieces total.
3. Arrange pieces end-to-end, wrong side up, on a flat surface. Make sure they are all going in the same direction, so that each hemmed end is next to a raw end. Overlap the pieces ½”, so raw edges are on top of hemmed edges. Glue pieces together to form a long strip. Working on length of strip, fold one edge under (toward wrong side) about ¼” and glue in place. Leave other edge raw. Fold short ends under about ¼” and glue in place.
4. Turn shirt right side out. Align one end of strip with a shoulder seam, right sides together, and pin so that raw edge of strip and edge of collar are aligned. Continue to pin edge of strip to edge of collar all the way around. Trim end of strip so it overlaps about ¾”. Working in small sections, glue cowl strip to shirt, about ½” in from collar’s edge. Glue ends together so they overlap.
5. Turn shirt wrong side out. Fold cowl strip over and pinedge to inside of collar. Working in small sections, glue pinned pieces together, about ½” in from collar’s edge.
6. Iron collar to make a crisp fold.
Ribbon-striped tank
YOU’LL NEED:
2. Arrange shirt on flat surface, front facing up. Measure distance between bottom of arm holes, then mark center point with a pin. Pin one end of a ribbon ½” to right of center, and a second ribbon ½” to left of center. Pin remaining pieces so there is about 1” between. Try shirt on and adjust spacing. Decide how long you want ribbons and trim accordingly (mid-abdomen tends to be most flattering).
3. Attach ribbons, using a thin bead of glue on back of each. Press down to set, making sure lines are straight.
Ribbon-neck tank
YOU’LL NEED:
2. Lay tank on flat surface, front facing up.
3. Make a thin bead of fabric glue down center of ribbon’s reverse side. Starting at one shoulder seam, adhere ribbon to shirt, lining up ribbon and collar edges. Continue until ribbon ends meet. Trim so that there is an extra ¼” of overlapping ribbon. Fold raw edge of ribbon under ¼”. Secure with fabric glue, then glue to shirt so ends of ribbon join. You can sew ribbon in place using a loose running stitch.
Fitted V-neck cardigan
YOU’LL NEED:
2. Arrange shirt on flat surface again, opening it up so that reverse side of fabric faces up.
3. Working on a raw edge, apply a thin bead of glue down length, close to edge, and fold over. Repeat on other raw edge. To finish hem, wait for glue to dry, then make another thin bead of glue down length, close to edge, and fold over. If desired, reinforce by sewing hems with a simple hand stitch.
4. Arrange shirt on flat surface so cut edges meet in the middle. Use fabric pencil to mark where you want buttons to go. They should start right at the V, about ½” in from the edge. Sew in place. Note: Buttons should go down shirt’s left side (right side when shirt is facing you).
5. Pull other side of shirt to overlap button side by about 1”. Use fabric pencil to mark center point of each button, where holes will go. You might want to try on shirt to make sure everything is aligned.
6. Measure diameter of buttons― you will create holes that are ½ to ¾ that size. (The stretchier the fabric, the smaller the hole.) Start hole by pinching fabric over the marked button spot and cutting a small vertical snip. Release fabric and continue to snip until hole is correct length, about half as long as diameter of button. Repeat for each hole, testing hole as you work to ensure you have proper alignment and size.
7. Turn wrong side out and sew around each buttonhole, looping thread through hole so that edges are fully wrapped in thread to prevent fraying.
So with these tips you can get your fall fashion rocking and trendy. Fashion does not have to be a hassle although it could be a chore. So gather your girlfriends and have a Saturday of fun and fashion where you each bring new ideas coupled with these to create unforgettable unique pieces. What other ways do you know to re-purpose your closet? Share your ideas and pictures with us.
Subscribe to:
Posts (Atom)